Tuesday, December 20, 2011

One of My Favorite Places


This fall, I posted about my new plein air painting system, and how I was practicing using it on my own property.  Well, here is a painting that I worked on outside until the weather shut me down and the leaves fell away.  My plein air painting became a studio painting based on photographic references.  This painting then served as my reference for the etching I did in my last blog post.

8x10 Oil on Canvas Panel 

I’m giving it to my husband.  It’s a painting of the patio that he built and is rightfully proud of, and the place where we like to eat our summertime suppers together.  Life is good.

Thursday, December 1, 2011

Etching

I’ve been taking a 5 week etching class at the IAC.  Etching is a printmaking process that goes something like this:

1.  Prepare a copper plate by cleaning it, spray painting the back side, and then coating the front side with asphaltum.

2.  Scratch through the asphaltum (like scratchboard) with a sharp tool to expose the copper plate.  Every scratch mark will translate to black in the final print.

3.  Soak the plate in acid for about 25 minutes or so.

4.  Clean off the asphaltum, leaving a clean, etched copper plate.

5.  Ink the plate, and wipe off most of the ink with a wad of starchy cheesecloth.  The ink will settle down into the etched grooves.

6.  Place the plate and a moistened sheet of printmaking paper together, and run it through a press (like a big, overgrown rolling pin).

7.  Separate, and voila! 

Tonight I finished up with steps 3 through 7, and I just wanted to share what my first print looked like.  It measures 4"x6".  I think I’m going to tint it with colored pencil.


I’ve done this process back in art school, and in a future post, I might share some of those.

Note to my family...yeah, I know it's the reverse view of our patio.  I forgot to reverse the image when I was scratching the plate.  Oopsie.

Thursday, October 6, 2011

Edith


Just wanted to share my hot-off-the-drawing-table drawing.  It is done in colored pencil for Jerry and Linda, a dear couple who have found me worthy of drawing each and every one of their grandchildren as gifts to their children.  We have had this wonderful client-artist relationship for a several years now.  I think this is the last grandchild that will be coming along.

First, let me introduce this little cutey named Edith.  She was waiting for my arrival, all dressed up and sitting patiently in the sun-room of her grandmother's house.  I was taken by how the sunlight lit up her hair, as if she were an angel (the photo doesn't really capture that).  I'm not even trying to be sappy.  I was truly struck by her.  She was soooo good through the photo shoot.

Her parents looked at all the photos, and chose the following pose, which they felt best captured Edith's personality.  I labored to show the little fly-away strands of hair, because they caught the light, and little girls are perfect like that. 
Below is a close-up, which for some reason shows the color of the paper more accurately.  Click on these images to enlarge.  It seems to look better when enlarged.

Edith is drawn on gray Stonehenge paper, in black and white, with hints of color reminiscent of a hand tinted photograph.  I used this style in the portraits of her two older brothers, and I wish I had done it for their cousins as well, but I hadn’t figured out this technique when I drew theirs.  Anyway, if you go to my website, you can see some (but not all) of the grandchildren I had the privilege of working with for this family.  They’re the ones done on gray paper.

Next project…kitty cats for my friend Sharla.

Monday, August 22, 2011

Qiang Huang workshop

I just finished a fabulous 3-day painting workshop with master artist Qiang Huang (pronounced Chong Wong). I have been stalking his blog for a while now, and I took a workshop with him 2 years ago in Cincinnati. This time it was in Noblesville, IN, hosted by the Hamilton County Artist’ Association. I love his work, it’s so fresh and lively and painterly. He just retired from his career as a physicist/engineer/rocket scientist, because his painting career has flourished. His genius definitely carries over into his artwork. Up close his paintings are an abstract collection of beautifully applied brushstrokes (total eye candy). From further away it is obvious that each stroke is there for a reason, and the whole painting becomes the scene he was capturing (again, total eye candy). There's no brush brush brush, blend blend blend. He puts it down and doesn't fuss over it, because each stroke of the brush is just right. It makes for a very strong painting.

Each day, Qiang would lecture with a power point presentation. The first 2 days he followed up lecture with a demo. He set up and painted a beautiful still life arrangement, and his demo was also video projected on a big screen for all to be able to see. Here is a LINK to an article about Qiang’s teachings, for those who wish to know more about him.

I just want to share some photos of my experience…


Here he is, priming his canvas with linseed oil.


This is a photo of the items he arranged for his still life demo.


The initial block-in...


 The painting as it progresses...


The finished painting:

This is the finished demo from the second day. Isn't it gorgeous? Roses are so difficult to paint so we watched closely.

We students gave it a go.  This is my painting.  I think we had about 3 hours to set up the still life, set up our gear, and attack the canvas.


My friend Janettmarie is an accomplished artist in Indianapolis. She took the class with me. She is a sweet and lovely lady. You should check out her blog.  I learned a bunch from her too.


This is day 3. I didn't take many photos on day 2. But if you click on the pic and enlarge it, you can see my unfinished day 3 painting on the easel (on the right), and my unfinished painting from day 2 above it. I had a bad habit of not getting my painting done in a timely fashion. Those who know me would not be surprised at this.  I'm slow as molasses at everything.


This is Qiang, and his lovely wife Song, and their son Jonathan.  Such dear, sweet people.


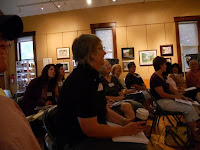
Here is the whole crew. We all had a ton of fun. I want to say thanks to the ladies of the HCAA, who all helped make the workshop a wonderful experience. Many ladies worked hard to make sure we had places to sit, tablets to take notes on, produce, flowers and other stuff to paint, snackies to eat and drink, rides to restaurants at lunch time, ample lighting to paint by, accommodations for Qiang and his family to stay, etc. I appreciated their kindness and hospitality.  If I lived closer, I would definitely be hanging out with these sweet ladies.  I felt blessed to have met them. Thanks Cheeri Dennis for being a great leader!


Wednesday, May 25, 2011

NICU pinewood derby car 2011

I had the privilege of creating this year's derby car for NICU. The theme this year is "The Hero Within". I posted a plea for ideas on facebook about who our "hero" should be. Good ideas were sent my way, and I settled on this one, submitted by Tami, NNP. She wrote, "Can you make it look like a preemie infant--because their strength in their tiny bodies to overcome so much makes them my heroes :-)." I thought that was pretty sweet, so I decided to honor "NICU babies" as our heroes.

Well, my husband and I went to work on it. Jeff did the wood design and made the little carseats (he's amazingly creative with woodworking). My daughter Alyssa helped me with photoshop for the banners (she's my 'puter techy). I assembled, painted and decorated it. After much shopping and a ridiculous amount of time spent, we ended up with this (click on the photos for a closer look).
Can you see who is driving? One of my favorite nurses, and Kenny Loggins. Well, Kenny is driving, and I'm sure she's distracting him. ;)
Yes, AAP would be proud...the kids are rear-facing.


Um, yep, those are 5 point harnesses.
Did we go overboard? Maybe. But I like it. It was fun.

Sunday, April 24, 2011

Happy Easter 2011

Drawn from an etching by Gustave Dore, called "Jesus Scourged".

Happy Easter!

Tuesday, January 25, 2011

He can paint!

My son Jake is very talented in drawing. Problem is, he doesn't have the patience to do it. His interests lie in other things.

Well, he made the mistake of asking me what I wanted for Christmas. I told him I wanted him to come paint with me at a Wine and Canvas event (his treat). I figured it would be fun to have him all to myself for a couple hours, plus I would get to see him paint. At first he was dreading the thought. But when he got there, he seemed to have fun.


He was being so silly the whole time and making me laugh.


This is Jake taking a pic of his masterpiece-in-the-making, and sending it to his girlfriend.

Getting closer to being done...he was always 5 steps behind the instructor, but he pulled it together at the end.

This was my favorite Christmas present he ever gave me!
When it was over, we went across the street so I could introduce him to the fabulousness of The Cheesecake Factory. He declared it his new favorite restaurant.

Friday, January 21, 2011

Teeny Tiny Paintings

Alyssa and I spent an evening making teeny tiny paintings. It was fun! We even painted the teeny tiny easels to match.